Project Mac Transplant
I picked up my trusty Dual 450 Mhz G4 Power Mac (Gigabit Ethernet) almost six years ago. At the time, this was a beefy machine, and even today it is still quite usable (though it shows it's age when running heavy applications like Photoshop, Firefox, and Eclipse.) To keep up with changing demands, most of the components have been swapped: An OEM Apple GeForce4 Ti video card drives the Cinema Display (the original video card couldn't handle it, much to my disappointment when I bought the monitor); The CD drive has been replaced with a Sony dual-layer DVD burner; A newer IDE controller card was added to handle larger internal drives (the original hardware could only see up to ~120'GB'ish); M-Audio hardware is used for audio capture; And a Sonnet RAID controller card drives the hot-swappable, 1.2TB RAID array (using SATA drives.)
All together, this box serves quite well as an A/V machine, so I'm not looking to get rid of it (especially since the new X86 PowerMacs are still vaporware.) However, the RAID backplane didn't actually fit in the Apple case (as you'll see below) and the lone 120mm case fan was starting to ask for help. Since Apple doesn't offer larger cases, a swap to a full size ATX case was in order.
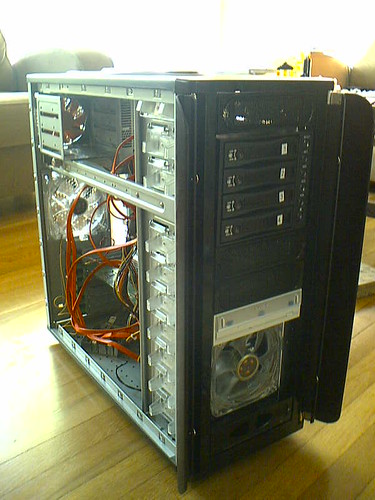
The Gigabit Ethernet Macs pre-date the elaborate case internals and "cooling zones" that the new G5's have. Inside, the hardware is organized just like any other PC, so while I didn't anticipate a perfectly smooth transfer, I had no doubt that the pieces could be made to fit into a modern ATX case. To give me some extra room, I went with the rather large, ThermalTake Armor case.
The new case towers over the Apple box, but it's extremely easy to work with, and provides plenty of options for mounting hardware and fans. The entire front is a stack of 5 1/2" bays, which leave plenty of choices for mounting the RAID backplane, the internal drive cage, and case fans.
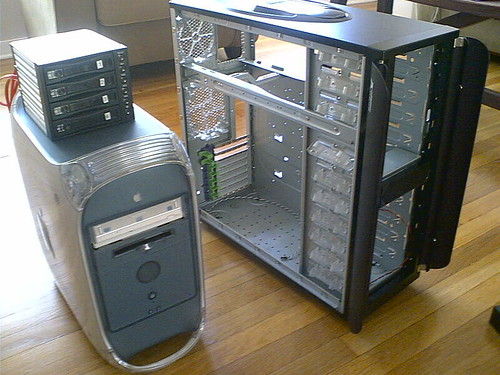
The stripped Armor case next to the G4. (And yes, that's really where the RAID backplane was "mounted" -- I simply ran the SATA and power cables through an empty PCI slot to the chassis up above. Don't do this at home kids!)
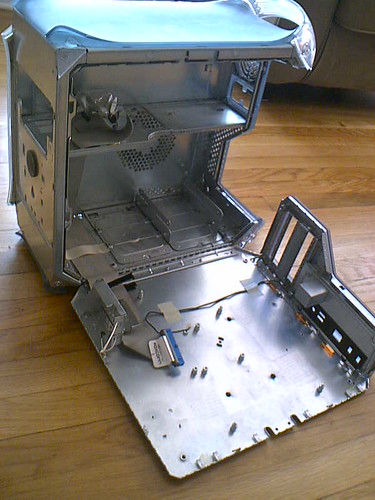
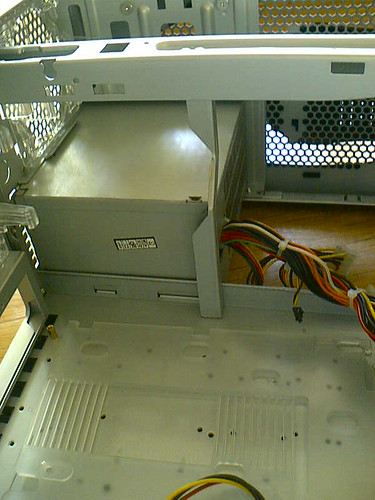
The Apple case popped open. You get a better view of the SATA cables here, and the limited space for hardware expansion. (NOTE: The boot drive is actually under the DVD burner now, in the space where the ZIP drive was mounted originally. I used to have a stack of drive sitting in the bottom of the case, but with the RAID, they were no longer needed.)
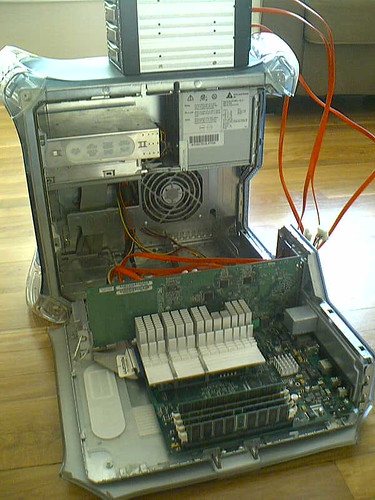
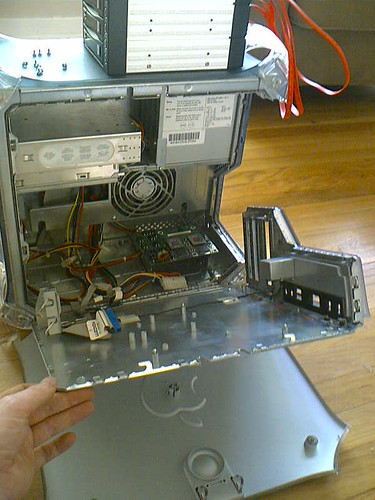
Before getting too far into the swap, I pulled the Apple motherboard and video card for a test-fit (show below.) The Apple motherboard lined up with one existing mounting hole, but otherwise, clearance and fit were tolerable.
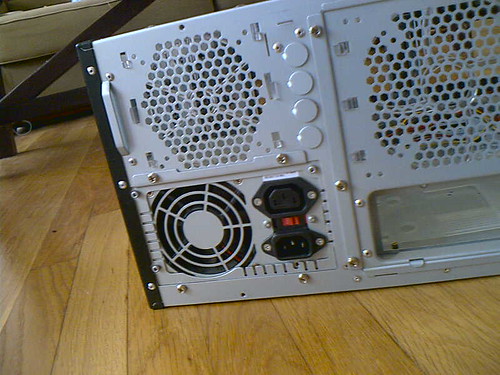
The Apple power supply was probably the only OEM part that just dropped in:
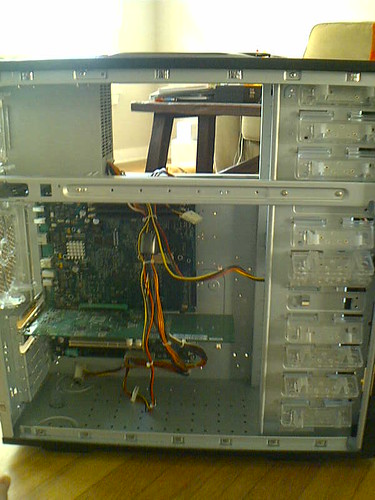
Next up was a test fit that the cables would still reach, and thankfully they did:
To mount the motherboard, I needed new holes for the board stand-offs. This was a simple chore for a Sharpie marker and a Bosch hammer-drill; However, before swiss-cheesing the case, I did have to decide how the stand-offs would actually attach to said holes. Normally the holes are threaded, and the stand-offs just screw-in; So my first inclination was to tap the holes after drilling. After considering how much time I'd waste doing this, I came up with an alternate plan. Instead of tapping the holes, I would simply make the holes just big enough for the threaded stand-offs to fit through, then attach a small nut from the other side to hold the piece in place. This saved a lot of time, and the result is just as sturdy. (Unfortunately, the macro focus mode on my N90 isn't quite as good as I'd like, so the close-up pictures of this mount didn't come out well enough to show.)
With the motherboard secure, the next piece of the puzzle was how to mount the processor board to motherboard. On the dual G4, the processors are actually on a small board with a ZIF-like connector on the back. With the connector snug, the processor board is then bolted to steel case-mounts that poke through the actual motherboard, and the aluminum cooling fins are hung off this little board. Without a hard mount, there would be no way to hang the cooling fins, so I needed a solution for this mount.
In the picture below, you'll see the processor board mounts sticking up in the middle of the steel side I'm holding. This piece is attached to the plastic exterior with a series of hex bolts.
After examining the original case, I noticed that the processor mounting holes were steel bits that were pressed into the side of the case. It occurred to me that if I could pull those out, I could reuse them. The extraction was quite simple: support the steel backing with some wood, and nicely ask the mounts to come out with a 5-pound mallet. They pop right out, and I was able to reuse them in the new case.
With the motherboard and processors secure, the rest was simple wiring. I put the drive cage and boot drive behind a 120mm fan up front; The DVD burner was mounted low in the case so that my cables would reach; And the RAID backplane slide right in up top.
After double-checking every mount and connection, I brought the machine back into the office for a test run. On boot-up, I was greeted with a never-before-seen startup screen:
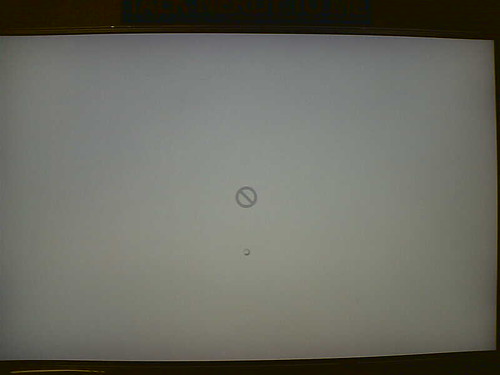
...the machine just hung there.
I've been mucking around with Apple hardware since I was about 9 years old, so seeing a new boot-up error screen is both exciting and a bit concerning. Since I had a feeling the hardware was just feeling like a lost kitten in a new home, I went with the easy potential fix and zapped the PRAM. It did the trick. (Though I still don't know what that error means.)
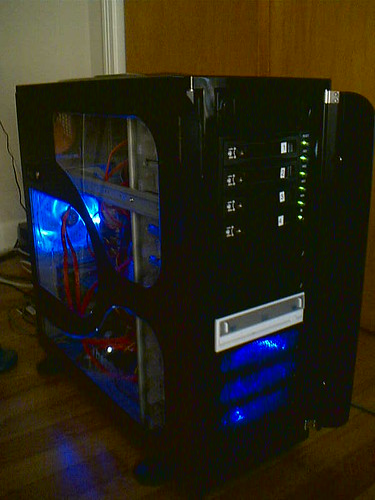
The finished product not only adds a little bling to an otherwise dated machine, but also pumps a pleasantly cool breeze from the back of the case. There's still a little finishing work left to do, but overall I'm extremely happy with the outcome -- and the confusion it causes for the casual observer.
Phase I complete: The ATX case swap was a success:
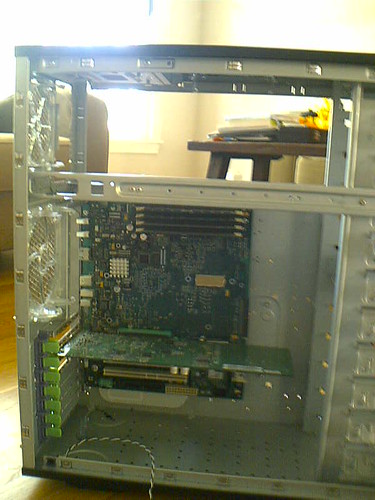
The remaining empty shell: